
To fix the blinking light on your Liftmaster garage door opener, simply hold down the lock button on the wall control for about two seconds to disengage the lock. If the light keeps flashing, the issue may be related to the wiring, and a maintenance check is recommended.
If the light on your Liftmaster garage door opener is blinking and the door won’t close, there are a few troubleshooting steps you can take. We will discuss the possible reasons for a blinking light on your garage door opener and provide solutions to fix the issue.
Understanding Liftmaster Garage Door Opener Blinking Light
When it comes to a Liftmaster garage door opener, a blinking light can be an indicator that something is not functioning correctly. Understanding the problem and identifying the reasons behind a blinking light is crucial for troubleshooting and resolving the issue. In this section, we will explore what a blinking light on a Liftmaster garage door opener signifies, why the light might be blinking, and the common reasons behind it.
What is a blinking light on a Liftmaster garage door opener?
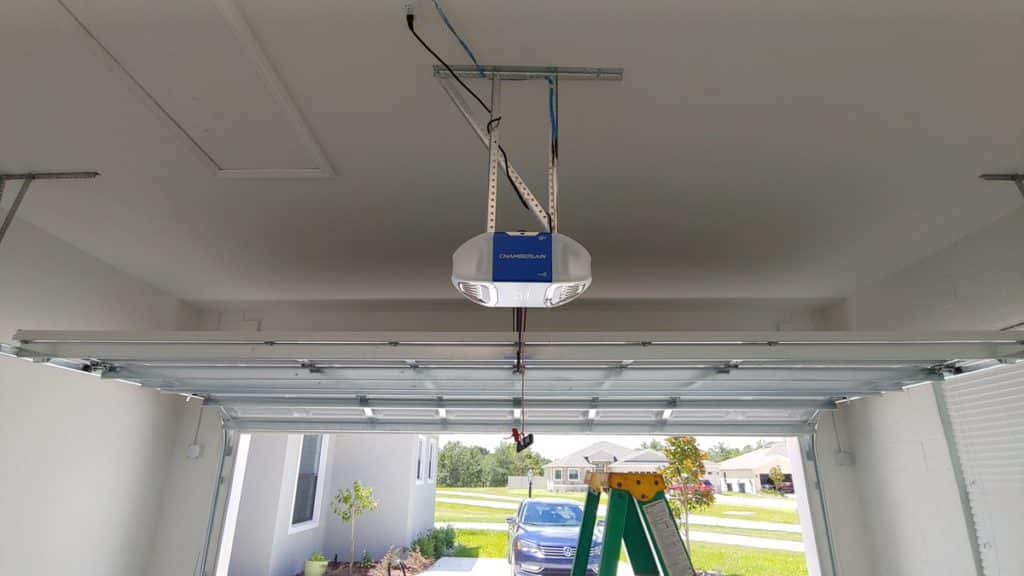
A blinking light on a Liftmaster garage door opener is a visual signal that there is an underlying problem with the opener system. The light, typically located on the wall control or the motor unit itself, will blink or flash in a consistent pattern, indicating that attention is needed.
Why is the light blinking?
The blinking light on a Liftmaster garage door opener can be attributed to various factors. It is crucial to identify the root cause in order to effectively troubleshoot and resolve the issue. Some common reasons for a blinking light on a Liftmaster garage door opener include:
- Sensor misalignment: If the safety sensors that detect obstacles in the path of the closing door are misaligned or obstructed, the blinking light may signify that the sensors are not functioning properly.
- Power interruption: A power surge or outage can cause the garage door opener’s light to blink. In such cases, checking the power supply and ensuring it is stable and connected can help resolve the issue.
- Wire-related issues: Loose or damaged wires within the opener system can lead to a blinking light. A thorough inspection of the wiring is necessary to identify and rectify any wire-related problems.
- Lock feature activation: If the lock feature of the Liftmaster garage door opener is engaged, the light may blink to indicate that the door is locked and cannot be operated with a remote control.
- Remote control malfunction: In some cases, a blinking light can indicate an issue with the remote control. This can be due to a dead battery, signal interference, or other remote-related problems.
By understanding these common reasons behind a blinking light on a Liftmaster garage door opener, homeowners can take the necessary steps to troubleshoot and resolve the issue. From sensor realignment to checking power connections, addressing these underlying problems can help restore the functionality of the garage door opener.
Troubleshooting Steps for the Liftmaster Garage Door Opener Blinking Light
When it comes to troubleshooting a Liftmaster garage door opener with a blinking light, there are specific steps you can take to identify and resolve the issue. By following these troubleshooting steps, you can get your garage door opener back in working condition quickly and efficiently.
Step 1: Checking for blocked or misaligned safety reversing sensors
The first step in troubleshooting a blinking light on your Liftmaster garage door opener is to check for any blocked or misaligned safety reversing sensors. These sensors are located near the ground on each side of your garage door. Ensure that there are no obstructions blocking the sensor’s path and that they are aligned properly.
Step 2: Removing any obstructions that may be blocking the sensors
If you find any obstructions blocking the safety reversing sensors, remove them to allow the sensors to function properly. This can include debris, objects, or even spiderwebs that may have accumulated over time.
Step 3: Testing the Safety Reversal System
After ensuring that the sensors are clear and aligned, it’s important to test the safety reversal system. Place an object, such as a box or a broom, in the path of the garage door. Close the door using the opener and check if it stops and reverses when it comes into contact with the object.
Step 4: Identifying potential problems with powerhead connections
If the safety reversal system is not functioning properly, it’s time to inspect the powerhead connections. Check if all the connections are secure and tight. Loose connections can cause issues with the garage door opener, including a blinking light.
Step 5: Inspecting the powerhead
Take a closer look at the powerhead to check for any visible signs of damage or wear. Look for loose wires, burnt-out components, or any abnormalities that may indicate a problem with the powerhead.
Step 6: Opening the door manually from the powerhead
If the powerhead appears to be in good condition, try opening the garage door manually using the powerhead. This will help determine if the issue lies with the opener itself or with the garage door.
Step 7: Checking the sensors for any issues
Revisit the safety reversing sensors and inspect them for any recurring issues. Ensure that they are still aligned correctly and free from any obstructions that might have reappeared.
Step 8: Plugging in the opener properly
Double-check the connection of the garage door opener to the power source. A loose or improperly plugged-in opener can cause a blinking light and other problems.
Step 9: Summary of troubleshooting steps
To summarize, the troubleshooting steps for a Liftmaster garage door opener with a blinking light are:
- Checking for blocked or misaligned safety reversing sensors
- Removing any obstructions that may be blocking the sensors
- Testing the Safety Reversal System
- Identifying potential problems with powerhead connections
- Inspecting the powerhead
- Opening the door manually from the powerhead
- Checking the sensors for any issues
- Plugging in the opener properly
Step 10: Alternative method: closing the door without the sensors
If all else fails, there is an alternative method to close the garage door without using the sensors. This can be a temporary solution until the issue with the opener or sensors is resolved.
Resolving The Issue
If you’ve noticed a blinking light on your Liftmaster garage door opener, don’t panic. This common issue can be easily resolved with a few simple troubleshooting steps. In this section, we’ll discuss some easy fixes for common problems causing the blinking light, as well as provide additional tips and tricks for fixing the issue. However, if you’re unsure or uncomfortable with performing these troubleshooting steps yourself, it’s always best to seek professional help to ensure the problem is addressed correctly.
Easy fixes for common problems causing the blinking light
If you’re experiencing a blinking light on your Liftmaster garage door opener, try these simple fixes before seeking professional help:
- Check the safety reversing sensors: These sensors are located near the ground on both sides of the garage door. Make sure they are clean and properly aligned. Sometimes, dust or debris can obstruct the sensors, causing the blinking light.
- Test the safety reversal system: To do this, place an object, such as a roll of paper towels, in the path of the closing garage door. The door should reverse within a few seconds of contacting the object. If it doesn’t, you may need to adjust or replace the safety reversal system.
- Ensure the lock feature is off: If the lock feature is engaged, it can prevent the garage door from closing properly. Press and hold the lock button on the wall control for about two seconds to disengage the lock. Check if the blinking light persists.
- Check the wiring: If none of the above fixes work, there may be an issue with the wiring. It’s recommended to schedule a maintenance check to have a professional assess and repair any wire-related problems.
Additional tips and tricks for fixing the blinking light issue
In addition to the easy fixes mentioned above, here are a few more tips and tricks that may help resolve the blinking light issue on your Liftmaster garage door opener:
- Clean the lenses of the safety sensors: Dust and dirt can accumulate on the lenses of the safety sensors, obstructing their function. Use a soft, lint-free cloth to clean the lenses and ensure they are free from any debris.
- Inspect the powerhead connections: Check if all the connections to the powerhead are secure and properly plugged in. Loose connections can sometimes cause the blinking light issue.
- Manually open and close the garage door: If the sensors or other components are not functioning properly, you can try manually opening and closing the garage door to temporarily resolve the issue. However, it’s important to address the underlying problem for a long-term solution.
When to seek professional help for a blinking light on a Liftmaster garage door opener
If you’ve attempted the easy fixes and additional tips outlined above but the blinking light issue persists, it may be time to seek professional help. The expertise and knowledge of a trained technician can ensure that the underlying problem is correctly diagnosed and fixed. Additionally, attempting complex repairs without proper knowledge can be dangerous and may cause further damage to the garage door opener system.
Remember, it’s better to be safe than sorry. Contact a professional technician to address the blinking light issue on your Liftmaster garage door opener and ensure the problem is resolved efficiently and effectively.
Frequently Asked Questions
Why is the light flashing on the Liftmaster garage door opener?
If the light on your LiftMaster garage door opener is flashing, try pressing the lock button on the wall control for two seconds. If the flashing persists, check your wiring or schedule a maintenance check.
How Do I Fix the Blinking Light on My Garage Door Opener?
To fix the blinking light on your garage door opener:
- Press and hold the lock button on the wall control for about two seconds to disengage the lock.
- If the blinking light persists, it may be a wire-related issue. Consider scheduling a maintenance check to inspect your wiring.
- Troubleshooting your garage opener light blinking issue may also involve realigning the safety sensors or cleaning the lenses.
- If none of these steps resolve the problem, consult a professional for further assistance.
What Do 10 Blinks Mean on a Liftmaster Garage Door Opener?
When the Liftmaster garage door opener blinks 10 times, it indicates an obstruction or misalignment in the sensors.
Why is the orange light blinking on my garage door opener?
The orange light on your garage door opener is blinking because there may be an obstruction or misalignment with the safety sensors. Try checking for any obstructions and realigning the sensors. If the blinking continues, it may be a wiring issue, and you should consider a maintenance check.
Why Is My Liftmaster Garage Door Opener Light Blinking?
The blinking light could indicate a wire-related issue. Consider scheduling a maintenance check to diagnose the problem.
Conclusion
If you find yourself dealing with a blinking light on your Liftmaster garage door opener, there are a few troubleshooting steps you can take to resolve the issue. First, try holding down the lock button on the wall control for about two seconds to disengage the lock.
If the light continues to blink, it may be related to a wire problem. In this case, it’s a good idea to schedule a maintenance check to determine if your wiring is causing the constant blinking. It’s important to address this issue promptly to ensure the safety and functionality of your garage door opener.
By following these troubleshooting steps, you can quickly resolve the blinking light on your Liftmaster garage door opener and have it working properly again. Don’t hesitate to seek professional assistance if you’re unable to resolve the issue on your own.